Ready to grow?
Website Helped Robert Geans Win $308K Job
2x Expected Opening Weekend Attendance
Cheetos Collab drove 184K+ Impressions
Donations Up 250% After Video
Our Design Helped Secure $50M Grant
Have you ever experienced frustration after color grading a video in DaVinci Resolve, when you find that the exported result is dull and doesn't resemble the vibrant colors you saw in the preview window? This guide will help you ensure that what you see in DaVinci Resolve is exactly what you get in the final export.
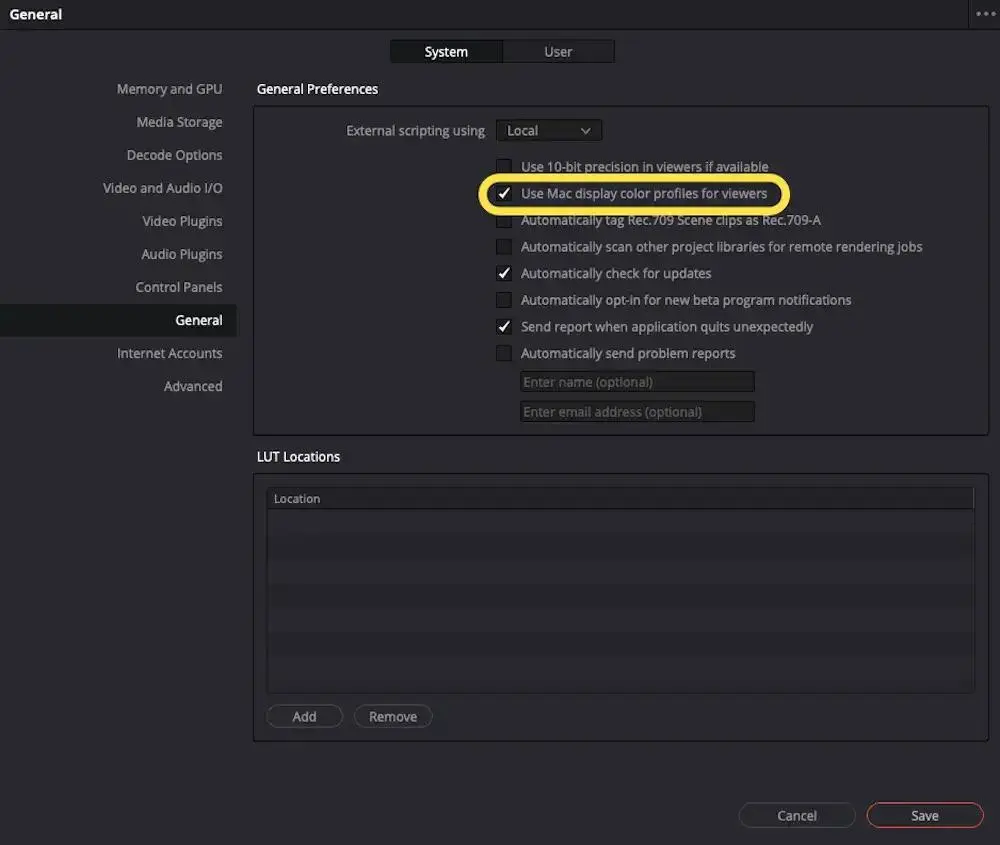
Before starting your color grading process, it's crucial in the "Preferences" tab under “General”, to enable "mac display color profiles for viewers". Don't forget to save your changes and restart DaVinci if this is your first time enabling this setting.
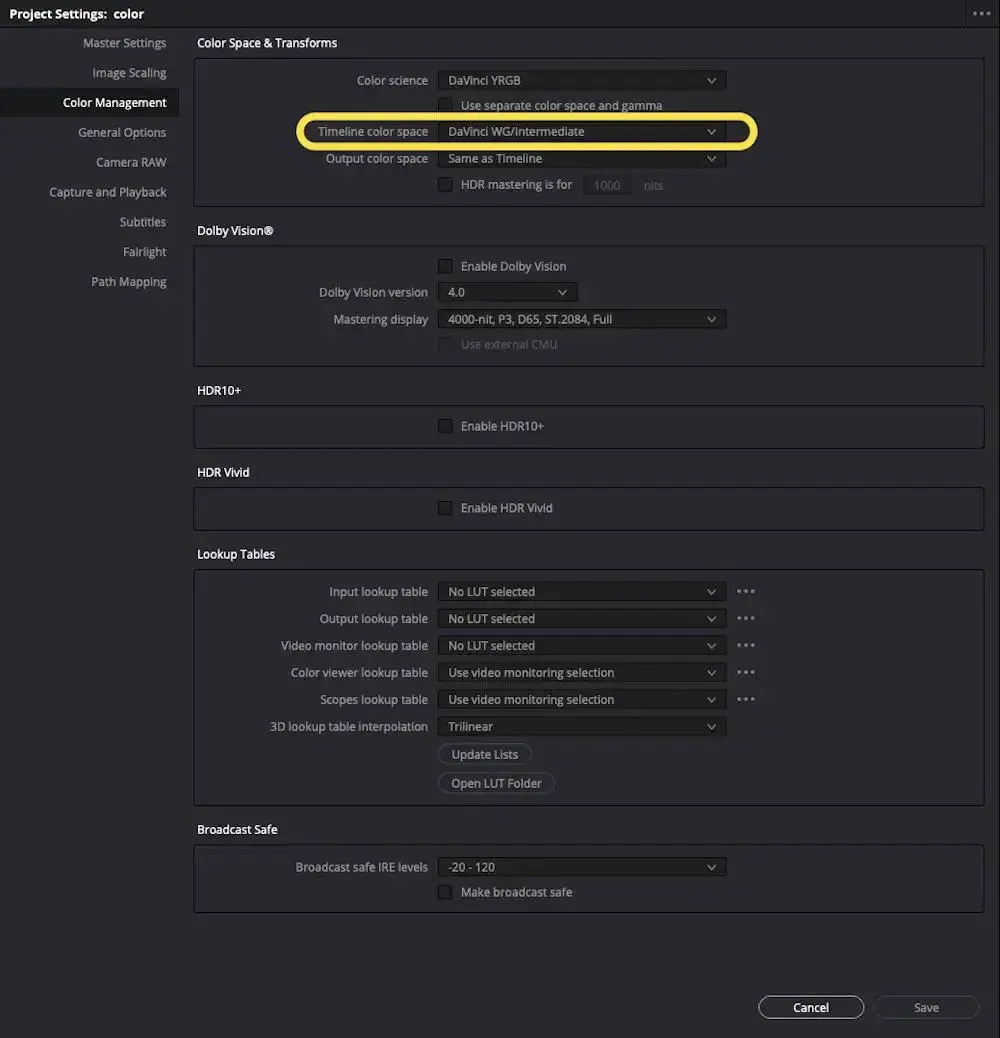
To set up the proper color space settings, in the "Project Settings" panel, navigate to the "Color Management" section, and set the "Timeline Color Space" to "DaVinci WG/Intermediate". This color space offers excellent dynamic range and retains highlight detail, allowing for more creative freedom in your color grading.
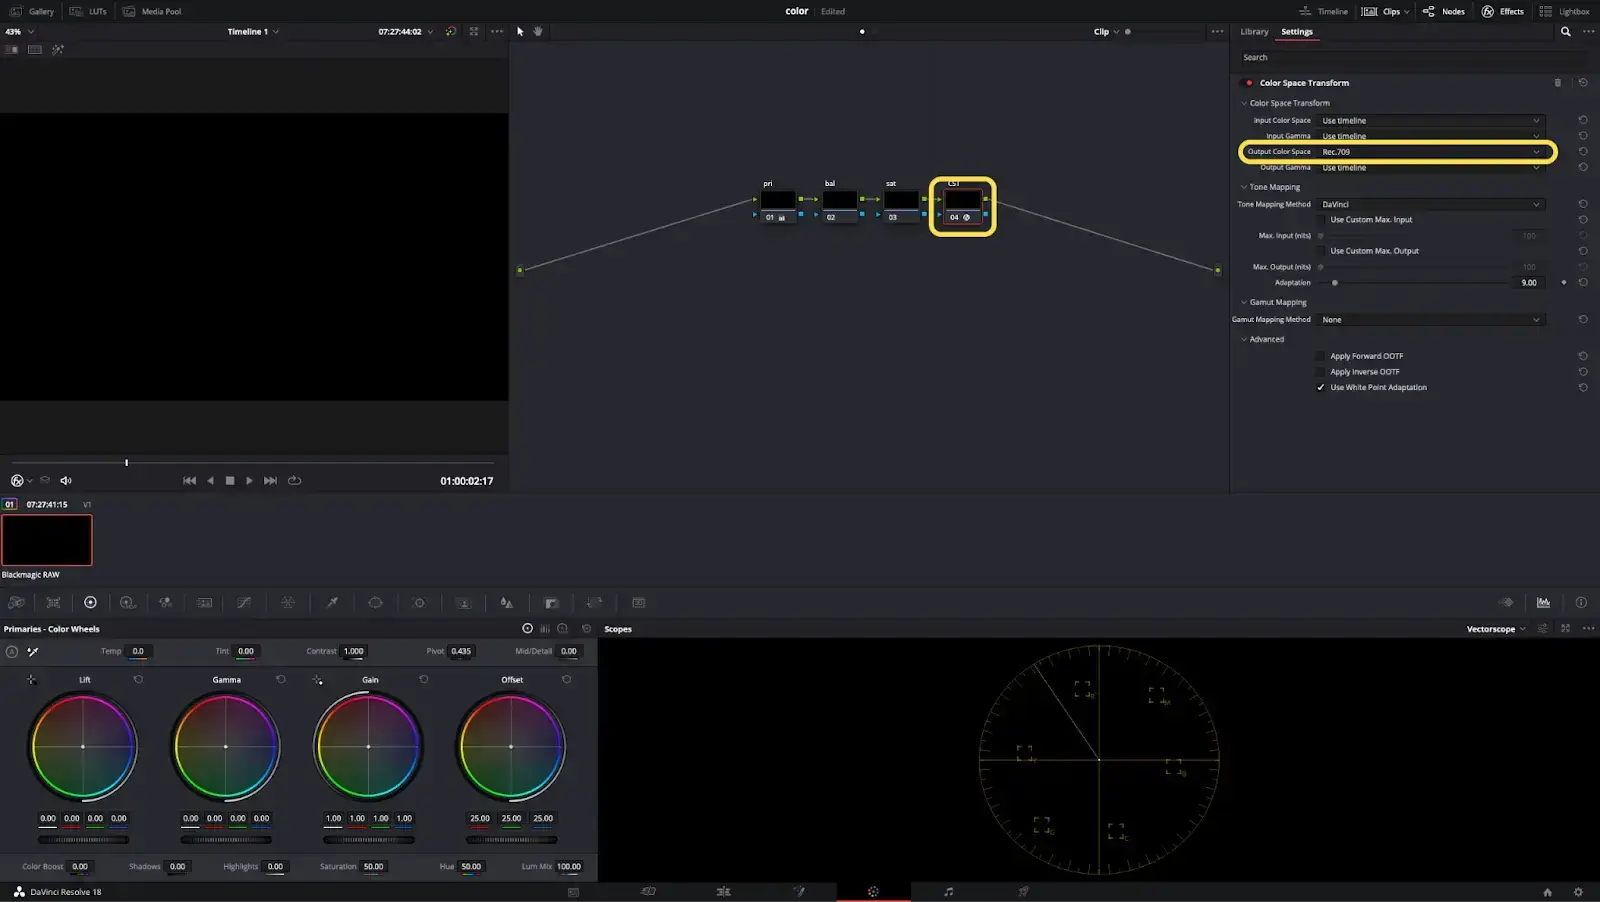
In the coloring page, make sure that the last node in your node tree has a color space transform effect, and set the output color space to "Rec 709". This allows you to view your footage at the same level of color and light range as most standard screens.
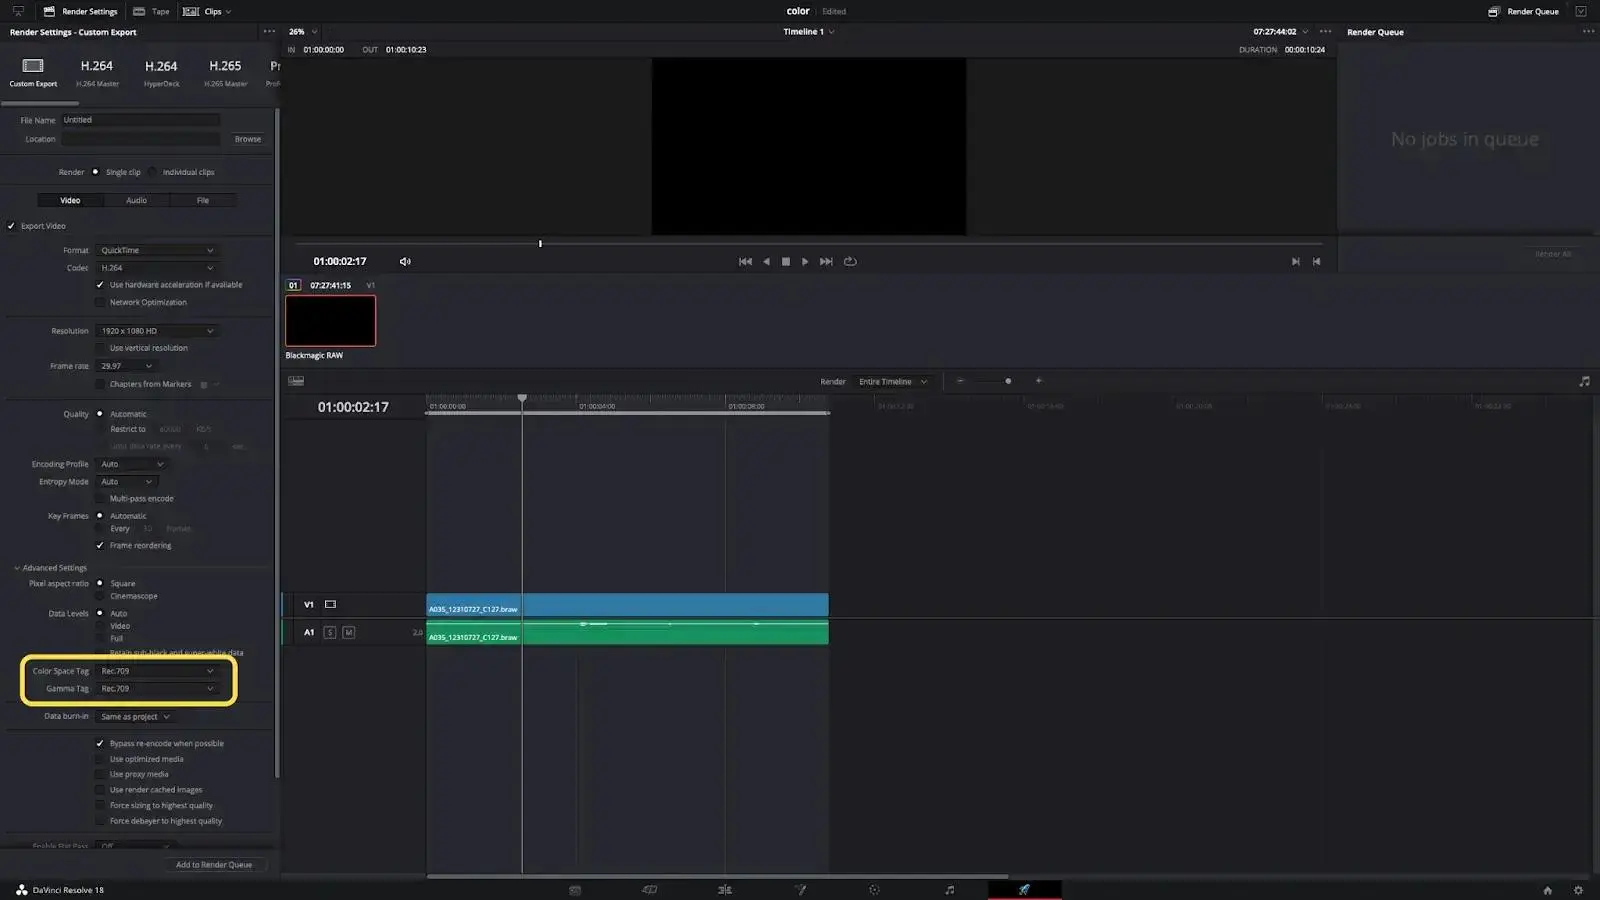
Finally, in the export settings, under "Advanced Settings", set the "Color Space Tag" and "Gamma Tag" to "Rec 709".
After following these simple steps, you'll never have to worry about mismatched colors in your exported videos again! Your finished product will always look just as vibrant and true to life as it did in the DaVinci Resolve preview window.